What Is Phantom Power?

Share Button

Condenser Microphones and DI Boxes that have active circuitry in them require electricity in order to function. Some Condenser Mics and Active DI Boxes have slots to insert batteries. But, no one wants to have to constantly replace batteries.

Phantom Power to the rescue!

Phantom Power Soundcraft EFX8

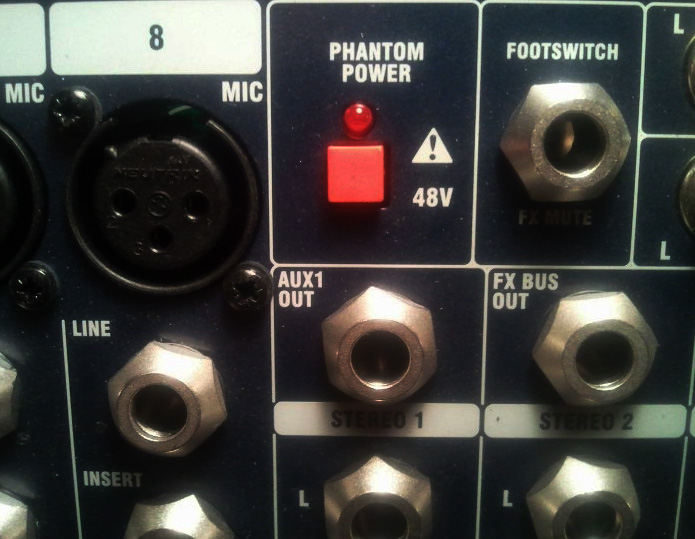
The phantom power button on a Soundcraft EFX8 soundboard.

Phantom Power is DC Voltage (just like battery electricity) that is sent from a phantom power supply through an XLR cable to the Mic or DI Box at the other end.


Phantom Power Buttons

48V Phantom Power Buttons

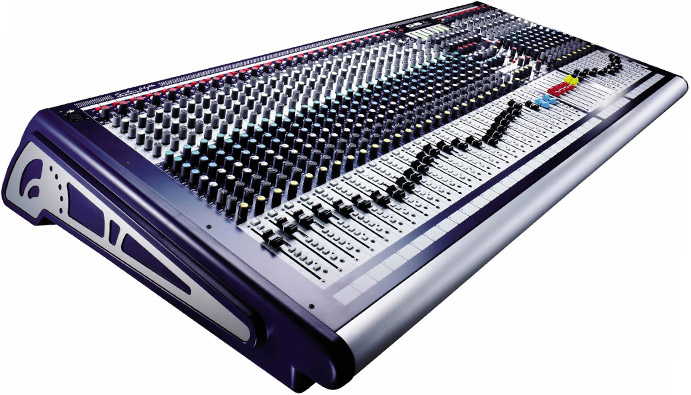
Phantom Power Supplies can be stand alone units, but are most commonly built into soundboards. On smaller and lower end mixers, there will be one phantom power button or switch. Once enabled Phantom Power will be sent to all XLR channels. On larger and higher end mixing boards, each channel will have it’s own Phantom Power button or switch. Generally stand alone preamps, used in recording studios, will have a phantom power button or switch.


Phantom Power Supply

Behringer Phantom Power Supply

The amount of voltage generally supplied is 48 volts. However, many condenser mics and DIs don’t require a full 48v. Some only require 9, 12 or 24 volts and have built in transformers to reduce the voltage and not damage the mic or DI box.


Most times it will be labeled as “48v” instead of “Phantom Power”. (same thing)

Avalon 737 Phantom Power

Phantom Power on the Avalon vt373sp

Virtually all modern mics and DI boxes that do not require phantom power (dynamic mics & passive DI boxes) will not have any issues if sent 48v. They simply will not use it. However, some vintage equipment (notably vintage ribbon microphones) can be severely damage if sent phantom power.

If you have the option, it’s best to only enable phantom power to the microphones that need it.


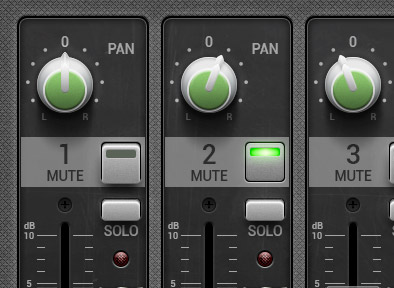
As well, if enabling phantom power, it’s a good idea to mute the channel(s) that will be affected before enabling it. Enabling phantom power can produce a loud pop sound. Once enabled (after the pop) it should not produce any other unwanted sound. If it does, your microphone or cable may be wired improperly.

Phantom power travels through the XLR cable on pins 2 & 3. Audio also travels through the XLR on pins 2 & 3. They do not affect one another. As long as the audio signal is balanced, phantom power does not affect the audio. You should not even know that it’s there! Hence the name, Phantom Power. Sneaky Sneaky!

Share Button

The low cut button. What does it do?

Share Button
Low Cut Button

Low Cut Button

When the low cut button on soundboard is pushed in, it engages a ‘Low Cut Filter‘ on that channel.  (same as ‘High Pass Filter‘)

  • It’s called a low cut filter because it cuts out all of the low sound below a certain frequency.
  • It’s called a high pass filter because it only allows the sound above a certain frequency to pass through. Both the same thing.
High Pass Filter on Avalon vt-737sp

High Pass Filter on Avalon vt-737sp


On the majority of soundboards that ‘certain frequency’ is fixed, hence only having one button for it. On most boards the low cut is at 75hz, 80hz or 100 hz. On some higher end consoles and studio gear, you are given a knob to control what frequency the low cut is at. Some even let you control how gradual or steep the cut is.


Why should I use low cut?

By using low cut appropriately you can achieve a cleaner mix, get more headroom out of your PA and reduce the chance of low feedback.


Low cut is, in my opinion, probably the most under-used feature on audio equipment. It is VERY valuable to have a low cut and can make the different between a clean mix and a muddy one.

Different sound sources produce different sounds with different ranges. (frequencies)

  • A Bass Amp can produce low bass all the way up to treble
  • A Guitar Amp produces mainly mids.
  • A Trumpet produces mids and treble.
  • Voices very, but generally produce sound from low mids to treble.

If you want a more in-depth look at what frequencies are produced from different sources, I recommend the following link.
Frequency Chart
(an interactive frequency chart)

Unless the sound source for your channel is producing fundamental bass sound, you should engage your low cut. Doing so will eliminate the amplification of unwanted low sound.

This unwanted sound can be:

  • Microphone handling or floor rumble (from bumping the mic or stepping on the floor that the mic stand is sitting on)
  • The popping of “P’s” and “B’s” from a voice
  • Unwanted electrical hum (60hz)
  • Other nearby sound sources (the bass amp on stage or the pounding subs that are less than 20′ away from your mic)


Low Cut on Soundcraft GB4

Low Cut on Soundcraft GB4

When mixing live, the question shouldn’t be, “Which channels should I turn the low cut on for?“.

It should be, “Which channels should I take the low cut off for?“.

My answer at most gigs would be:

  • Kick Drum
  • Floor Tom
  • Bass Guitar
  • Some Synths (depending on the sound)
  • Sample (depending on the sound – if there are bass drops, you definitely need it off)
  • Some Keyboards (depending on instrumentation)


Another plus to using low cut properly is, that when you reduce the amount of unwanted bass going through your PA, you will increase your headroom. This is because it is more work for your power amps to amplify bass. So again, cutting out the unwanted bass, will allow you to get more volume out of your sound system. Not to mention it will sound less muddy.

Low Cut on a Mackie Onyx 1640 Mixer

Low Cut on a Mackie Onyx 1640 Mixer


Share Button

Panning: Mixing Live With PAN

Share Button

What is pan you ask?

Pan for CookingPeter PanPAN knobs

The Pan that I’m talking about is the audio pan control or pan pot (panoramic potentiometer). The knob that dictates how much of the signal gets sent to the left and right main outs.


What it does:

On a mixing board, each channel has a PAN knob. This knob is usually above the fader. If you leave the PAN knob in the middle (at 12 o’clock), an equal amount of the channel’s signal will be sent to the left and to the right. We call this ‘center’.

Fostex T50RP Headphones

Fostex T50RP Headphones

If wearing headphones or standing out in front in the middle of 2 speakers (in stereo), if you listen to a signal paned exactly center, it will sound like the sound is coming from the middle. (from in front of you) If the Signal is panned all the way left it will be 100% in the left speaker and not at all in the right. That same goes for the right.

For example: If you leave a vocalist panned center, they will sound like they are coming for in between the speakers (when sitting in the center of the audience).

Instead of saying, “panned a little to the right”, many audio techs will say, “It’s sitting a little to right in the mix”.

Left And Right Speakers

Left & Right Speakers

3 Reasons to PAN while mixing live.

(This applies if you’re running a stereo system & the majority of your audience can hear both speakers)

1: To make the lead vocal easier to hear

For the vast majority of music, the most important thing to hear clearly is the lead vocal. The lead vocal should always be heard and should always sit dead center in the mix. It’s a good idea to PAN other mid-range channels away from center so that the lead vocal comes through clearer. The more you PAN away from center, the easier the lead vocal will be to hear.


2: To make the mix sound cleaner

The goal is to make it easier to hear every instrument clearly. When you have multiple instruments or voices that produce many of the same frequencies they should not sit in exactly the same place in the mix as each other. Doing so will result in a loss of clarity. They will clash and it will hard for your audience to hear what they are doing. Multiple electric guitars, multiple toms, multiple background vocals or combinations like fiddle and banjo are examples of things that should not sit in the same place as one another in the mix. Play around with the PAN on your instrument and background vocal channels and find out what works best with your band. Again, the goal is to make it easier for your audience to hear and decipher all of the individual parts in the band clearly.


3: To make the mix sound bigger

Panning things certain ways can make your mix sound ‘bigger’ (or ‘wider’). This can be achieved by panning things like electric guitars, drum overhead, stereo synths & stereo reverbs all the way left and right. This leaves the fundamentals like Lead Vocal, Bass, Kick & Snare in the middle to be heard clearly, while the rest of the channels give the listener a wide stereo soundscape to listen to. When you have synths or digital pianos, DI both their Left and Right outputs. Then experiment panning them hard left & right, 25% left & right or somewhere in between. By doing this you can control how ‘wide’ you want it to sound as well as capture stereo effects that the keyboard or synth has going on much better! (like stereo tremolo or reverb) Mixing with Stereo Reverb also can make a massive difference on how ‘big’ your mix sounds. Adding it to the channels that you have panned dead center (like lead vocal, snare & kick ) can result in your mix sounding wider and bigger. (Note: Don’t over do it with the reverb.)


The following is one example of how PAN could be used at a gig.

Ch 1 – Kick Drum
Ch 2 – Snare Drum
Ch 3 – Rack Tom 1
Ch 4 – Rack Tom 2
Ch 5 – Floor Tom
Ch 6 – Drum Overhead L
Ch 7 – Drum Overhead R
Ch 8 – Bass Guitar
Ch 9 – Electric Guitar 1
Ch 10 – Electric Guitar 2
Ch 11 – Keyboard L
Ch 12 – Keyboard R
Ch 13 – Background Vocal 1
Ch 14 – Lead Vocal
Ch 15 – Background Vocal 2
Center
Center
50% Right
50% Left
Center
100% Left
100% Right
Center
100% Left
100% Right
50% Left
50% Right
25% Left
Center
25% Right
Share Button

Mixing Live: 3 Tips To Make It Sound Great!

Share Button
Soundcraft GB4 Sound Board

Soundcraft GB4 Mixer

There are so many factors that affect the way a mix sounds live!  The tech (ear, experience, skill), how good the band is, what equipment is used, the room.  In this blog post, I’m going to focus on 3 simple tips for the up and coming audio tech to improve their mix.

Get rid of the bad! (with your mid-EQ)

When doing individual line checks, solo the channel you are working with in your headphones. Now, ‘get rid of the bad’. Do this by EQing out frequencies that sound bad. If you are not super familiar with all of your frequencies yet, here is a fast and simple way to do this. On the EQ for the channel you are working with, find your sweepable ‘mid volume knob’ and turn it up. Now slowly turn the sweepable ‘mid frequency knob’ all the way up and down. If you get to a point where it sounds awful, leave the ‘mid frequency knob’ where it is. Now turn the ‘mid volume knob’ down until it sounds pleasing to listen to. You may have to just turn it down a bit (like at 10 or 11 O’clock). Or if the original sound is extremely harsh, you may want to turn it down all the way. But, be careful not to over EQ if it doesn’t need it. If you take out too much you may lose the tone of the sound source and it may get lost in your overall mix. If you have multiple sweepable mid-EQs on your board, you may want to do this with both of your mids. EQ is usually best used taking out the bad as opposed to boosting. The couple channels that I do however regularly boost the bass on are the Kick Drum and the Floor Tom. Not everything you encounter will need to be EQ’d.


Mackie Onyx 1640 Soundboard EQ Section

Mackie Onyx 1640 Soundboard – EQ w/ Dual Sweepable Mids

Get rid of the unnecessary! (with your low-cut)

Your mixer should have a low-cut button (same a high pass). This is a very valuable tool! What this does is it takes out all of the low frequencies under usually 100 Hz or 80 Hz. (depending on the mixer) If the sound source you are working with is not producing low bass, you should low cut it. If you don’t, it will just muddy up your mix and you will lose headroom. I usually push in the low-cut button on every channel except Kick Drum, Floor Tom, Bass Guitar, Synths & Samples.

One extra thing to note is that Electric Guitar is a mid-range instrument. Guitar Amps have woofers in them. (no sub-woofers & no horns) Electric Guitar channels should have the low cut button engaged. Furthermore, a lot of time I will turn the treble EQ knob down on electric guitar because the amp is not producing hi treble. It will make things sound less harsh and cleaner.


Make sure you can hear everything!

Ask yourself, “Can I hear all of the instruments and vocals?”. If you see something happening on stage but can’t hear it, you have a problem. This could be anything from a vocalist or a snare drum. This sounds elementary, but is many times overlooked. Make sure that you look up at the band often. Look at what is happening on stage and make sure that what you are seeing is lining up with what you are hearing. As well, when a sound guy has his eyes glued to his sound board it’s not good. It’s always good to keep as much eye contact with the band as possible. You never know when a performer may need a monitor mix adjustment (if you don’t have a separate monitor tech). As well, it’s good to keep a watchful eye for fallen microphones or other surprises.


Happy Sound Guy

I’m a happy sound guy!
People like me!

Be pleasant!! (a bonus tip)

No one wants to deal with a grumpy sound guy! Keep a positive attitude. The band will perform better because of it and inadvertently, your mix will sound better!


There are many different tricks, techniques and things to keep in mind while doing sound. I will be touching on some of the following in future blogs:

  • Using Professional Level Equipment
  • Using the Proper Microphone
  • Mixing with Gates
  • Mixing with Reverb
  • Mixing with Sub-Groups
  • Mixing with Compression
Share Button